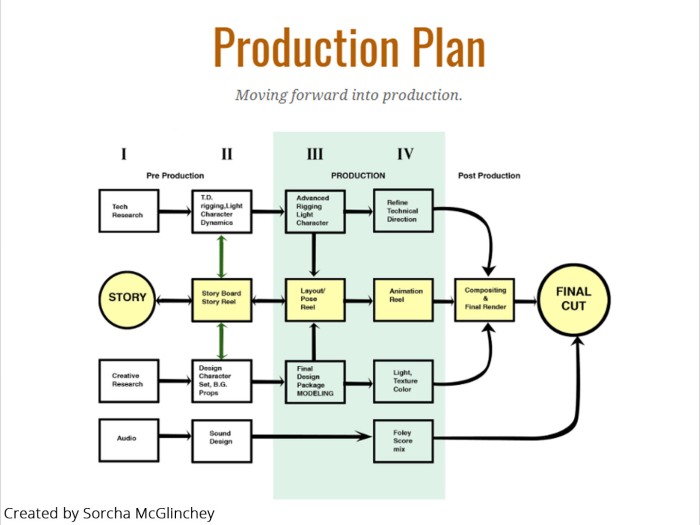
Sorcha put together this production plan to help us visualise what can be done at certain points as we progress through the project, for example, if character models are signed off and people are working on storyboards I can start the rigging process.
However, before jumping onto a rig I normally like to plan out the process into several stages. Which I picked up from Blizzard TD and Rigging artist, Carlo Sansonetti.

The stages are constructed as follows:
- Communication
When the model is completed and passed onto the rigger for review, here the rigger reviews the mesh to ensure that it has an optimised mesh density and whether the geometry will allow for appealing character deformations for animation.
2. Skeletons
When the rigger inserts joints into the mesh, ensuring that they’re efficiently place to ensure the mesh will be able to deform in the correct way. Additionally reviewing concepts for orientation, naming conventions etc. Establishing the base foundations that the rest of the rig will be built on (very important)
3. Deformations
(The fun part) When the rigger uses the applications proprietary deformers to ensure that the visual quality of your character matches the design.
4. Controls
The implementation of the components that the animators are going to use move,pose and breath life into your characters. Good rig controls communicate to the animator how a rig functions.
5. Speed
Often the subject of debate between riggers and animators, its the riggers responsibility to find the balance between how the deformations look and how fast a rig is.
6. Communication
When the rigger completes a rig they need to pass it on to the animator, through this transition there will be a lot of communication between the rigger and the animator as the animator will provide a lot of feedback to the rigger based on what they need to do with the rig for certain shots.
